🏡 Homelab II: Proxmox cluster, ZFS and NFS
In the previous part of this series, I assembled (and modified) hardware and setup the base operating systems on the machines. In this part, I’ll go over how to connect the Proxmox nodes together, add a quorum device and provision some storage with ZFS. Also one of the ZFS drives will be configured with NFS to share container templates, ISOs, and snippets.
# Cluster
If you only have one machine in your homelab, you can skip this step.
To create a cluster, pick one node to initialize it on:
root@r720$ pvecm create rob-labAnd now it’s a one node Proxmox cluster.
Then on the second node to add, join via the first node’s IP address:
root@nuc$ pvecm add 192.168.1.100Now it’s a two-node cluster:
root@nuc$ pvecm status
Cluster information
-------------------
Name:             rob-lab
Config Version:   2
Transport:        knet
Secure auth:      on

Quorum information
------------------
Date:             Thu Dec 30 20:22:25 2021
Quorum provider:  corosync_votequorum
Nodes:            2
Node ID:          0x00000002
Ring ID:          1.9
Quorate:          Yes

Votequorum information
----------------------
Expected votes:   2
Highest expected: 2
Total votes:      2
Quorum:           2
Flags:            Quorate

Membership information
----------------------
    Nodeid      Votes Name
0x00000001          1 192.168.1.100
0x00000002          1 192.168.1.200 (local)
Under the hood, Proxmox uses the corosync cluster engine that uses a voting system with each node in the cluster. In an ideal scenario, there would be an odd number of nodes, but since I only have two machines I’m going to setup the Raspberry Pi as a voter so that the cluster can properly reach quorum. The Pi is going to be configured as a corosync qdevice:
pi@piprimary$ sudo apt install corosync-qnetd corosync-qdeviceUnfortunately the qdevice setup will require password auth via SSH to the root user. So the Pi’s SSH configuration will temporarily be changed to allow root login via SSH and a root password must be set:
pi@piprimary$ sudo su -
root@piprimary$ passwd
New password:
Retype new password:
passwd: password updated successfully
root@piprimary$ vi /etc/ssh/sshd_config # Set PermitRootLogin to "yes"
root@piprimary$ systemctl restart sshd
The qdevice package needs to be installed on each of the Proxmox nodes as well:
root@r720$ apt install corosync-qdeviceroot@nuc$ apt install corosync-qdeviceAdding the Pi as a qdevice to the cluster is slightly different from adding a normal node. On an already existing cluster node use pvecm qdevice setup to add the Pi by IP:
root@r720$ pvecm qdevice setup 192.168.1.254Now, it’s a two node cluster but with three members and three expected quorum votes:
root@r720$ pvecm status
Cluster information
-------------------
Name:             rob-lab
Config Version:   3
Transport:        knet
Secure auth:      on

Quorum information
------------------
Date:             Fri Dec 31 12:41:02 2021
Quorum provider:  corosync_votequorum
Nodes:            2
Node ID:          0x00000001
Ring ID:          1.9
Quorate:          Yes

Votequorum information
----------------------
Expected votes:   3
Highest expected: 3
Total votes:      3
Quorum:           2
Flags:            Quorate Qdevice

Membership information
----------------------
    Nodeid      Votes    Qdevice Name
0x00000001          1    A,V,NMW 192.168.1.100 (local)
0x00000002          1    A,V,NMW 192.168.1.200
0x00000000          1            Qdevice
Back on the Pi, disable SSH root login:
root@piprimary$ vi /etc/ssh/sshd_config # Set PermitRootLogin to "no"
root@piprimary$ systemctl restart sshd
# Redundancy with ZFS
While the NUC will just be using the single SSD for the host OS and all workload storage, the Poweredge has a few drives that need to be configured with ZFS.
ZFS filesystems are built on virtual storage pools. For now, there will be two pools, ssd-mirror and rusty-z2, as mentioned in the first post in this series. The third pool, wolves-z will be handled later, since the entire controller connecting the drives will be passed through to a VM.
Create a mirrored pool of two drives called ssd-mirror:
root@r720$ zpool create ssd-mirror mirror /dev/sdo /dev/sdqCreate a RAID-z2 pool of 11 drives called rusty-z2 (the /dev/ can be omitted):
root@r720$ zpool create rusty-z2 raidz2 sde sdf sdg sdh sdi sdj sdk sdl sdm sdn sdproot@r720$ zfs list
NAME USED AVAIL REFER MOUNTPOINT
rusty-z2 1.10M 7.49T 219K /rusty-z2
ssd-mirror 528K 899G 96K /ssd-mirror
root@r720$ zpool status
pool: rusty-z2
state: ONLINE
config:
NAME STATE READ WRITE CKSUM
rusty-z2 ONLINE 0 0 0
raidz2-0 ONLINE 0 0 0
ata-ST91000640NS_9XG3QG5J ONLINE 0 0 0
ata-ST91000640NS_9XG3WGKZ ONLINE 0 0 0
ata-ST91000640NS_9XG3VHK5 ONLINE 0 0 0
ata-ST91000640NS_9XG3TRW7 ONLINE 0 0 0
scsi-35000c50083a28083 ONLINE 0 0 0
scsi-35000c50083a0395b ONLINE 0 0 0
ata-ST91000640NS_9XG3WGCA ONLINE 0 0 0
ata-ST91000640NS_9XG3V6JB ONLINE 0 0 0
ata-ST91000640NS_9XG40C6A ONLINE 0 0 0
ata-ST91000640NS_9XG40JQH ONLINE 0 0 0
ata-ST91000640NS_9XG3VAEC ONLINE 0 0 0
errors: No known data errors
pool: ssd-mirror
state: ONLINE
config:
NAME STATE READ WRITE CKSUM
ssd-mirror ONLINE 0 0 0
mirror-0 ONLINE 0 0 0
ata-CT1000MX500SSD1_2147E5E74EEA ONLINE 0 0 0
ata-CT1000MX500SSD1_2147E5E73F89 ONLINE 0 0 0
errors: No known data errorsTo make these available to Proxmox, they’ll need to be added manually to /etc/pve/storage.cfg like so:
zfspool: rusty-z2
  pool rusty-z2
  content images,rootdir
  mountpoint /rusty-z2
  nodes r720

zfspool: ssd-mirror
  pool ssd-mirror
  content images,rootdir
  mountpoint /ssd-mirror
  nodes r720
Alternatively, this can be also done in Proxmox’s web console under Node > Disks > ZFS > Create and it will create the zpool and storage entry all together. This is way easier than using the CLI but it’s good to know how this is all happening behind the pretty web console.
Each storage type in Proxmox has restrictions to the type of content it can hold. For instance, the zfspool type can only hold images or rootdir, which are VM disk images and container directories. For the ssd-mirror type this is perfect, because it will be for those exact workloads. For the rusty-z2 pool, we’ll need a different storage type.
To do so, initialize a new ZFS dataset called pve under rusty-z2:
root@r720$ zfs create rusty-z2/pveAgain, to use this in Proxmox it must be added to /etc/pve/storage.cfg:
dir: rusty-dir
  path /rusty-z2/pve
  content backup,snippets,iso,vztmpl
  nodes r720
  prune-backups keep-all=1
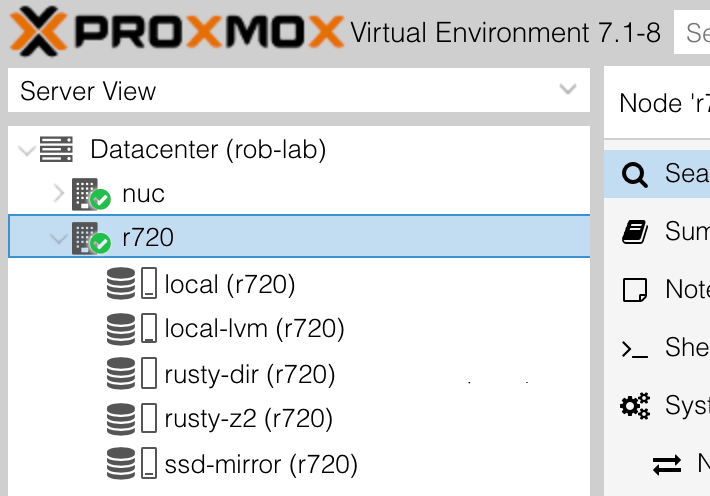
Notice the dir type with a content of backup,snippets,iso,vztmpl. Once this is done, all of the storage will appear in the web console under the r720 node:
# ZFS shared over NFS
It would be really convient if the NUC could access the rusty-dir storage, so that it could use that redundant storage for backups and share ISOs, container templates, snippets, etc. With ZFS and NFS this is dead simple.
Add NFS server:
root@r720$ apt install nfs-kernel-serverSet the dataset to share NFS:
root@r720$ zfs set sharenfs='rw' rusty-z2/pveOn the NUC node, add the following to /etc/pve/storage.cfg:
nfs: rusty-nfs
  export /rusty-z2/pve
  path /mnt/pve/rusty-nfs
  server 192.168.1.100
  content backup,snippets,iso,vztmpl
  nodes nuc
  prune-backups keep-all=1
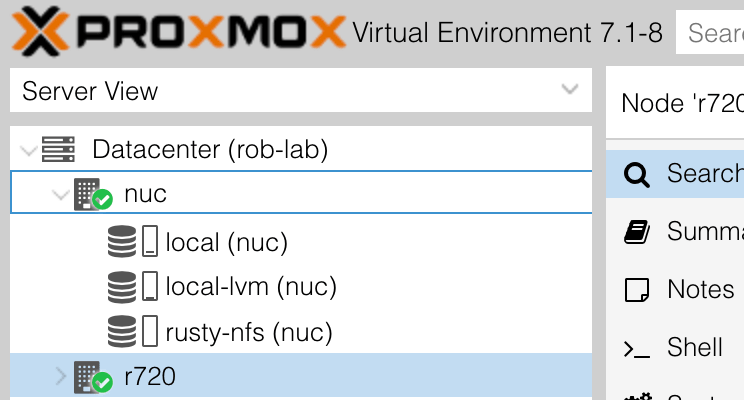
In the Proxmox console, the new NFS storage should appear under the NUC node:
As a quick test, on the r720 node, download a container template:
root@r720$ pveam download rusty-dir ubuntu-20.04-standard_20.04-1_amd64.tar.gzAnd on the NUC node, it should appear in the corresponding NFS:
root@nuc$ pveam list rusty-nfs
NAME                                                         SIZE
rusty-nfs:vztmpl/ubuntu-20.04-standard_20.04-1_amd64.tar.gz  204.28MB
Now the NUC can have redundant storage over NFS.
# Next
The machines are running, storage is configured and the cluster is ready for some workloads, but before that it’d be a good idea to automate some of the preflight tasks. In the next part, I’ll take a look at Ansible to harden access and handle any of the post-install configuration.